How to Set Up a MetaMask Wallet
MetaMask is a free hot wallet service available as a smartphone app or web browser extension
Source: https://www.coindesk.com/learn/how-to-set-up-a-metamask-wallet/ Video: https://www.youtube.com/watch?v=afATAw7iuUM&t=1s (Source: Amikes)
MetaMask is a free crypto wallet software that is essential for collecting rewards from DESports. You can create a MetaMask Wallet to receive and transfer crypto currencies from and to DESports.
You can download MetaMask directly onto your phone or the Google Chrome, Mozilla Firefox, Brave or Edge browser similar to an ad blocker extension.
Getting started
Installation
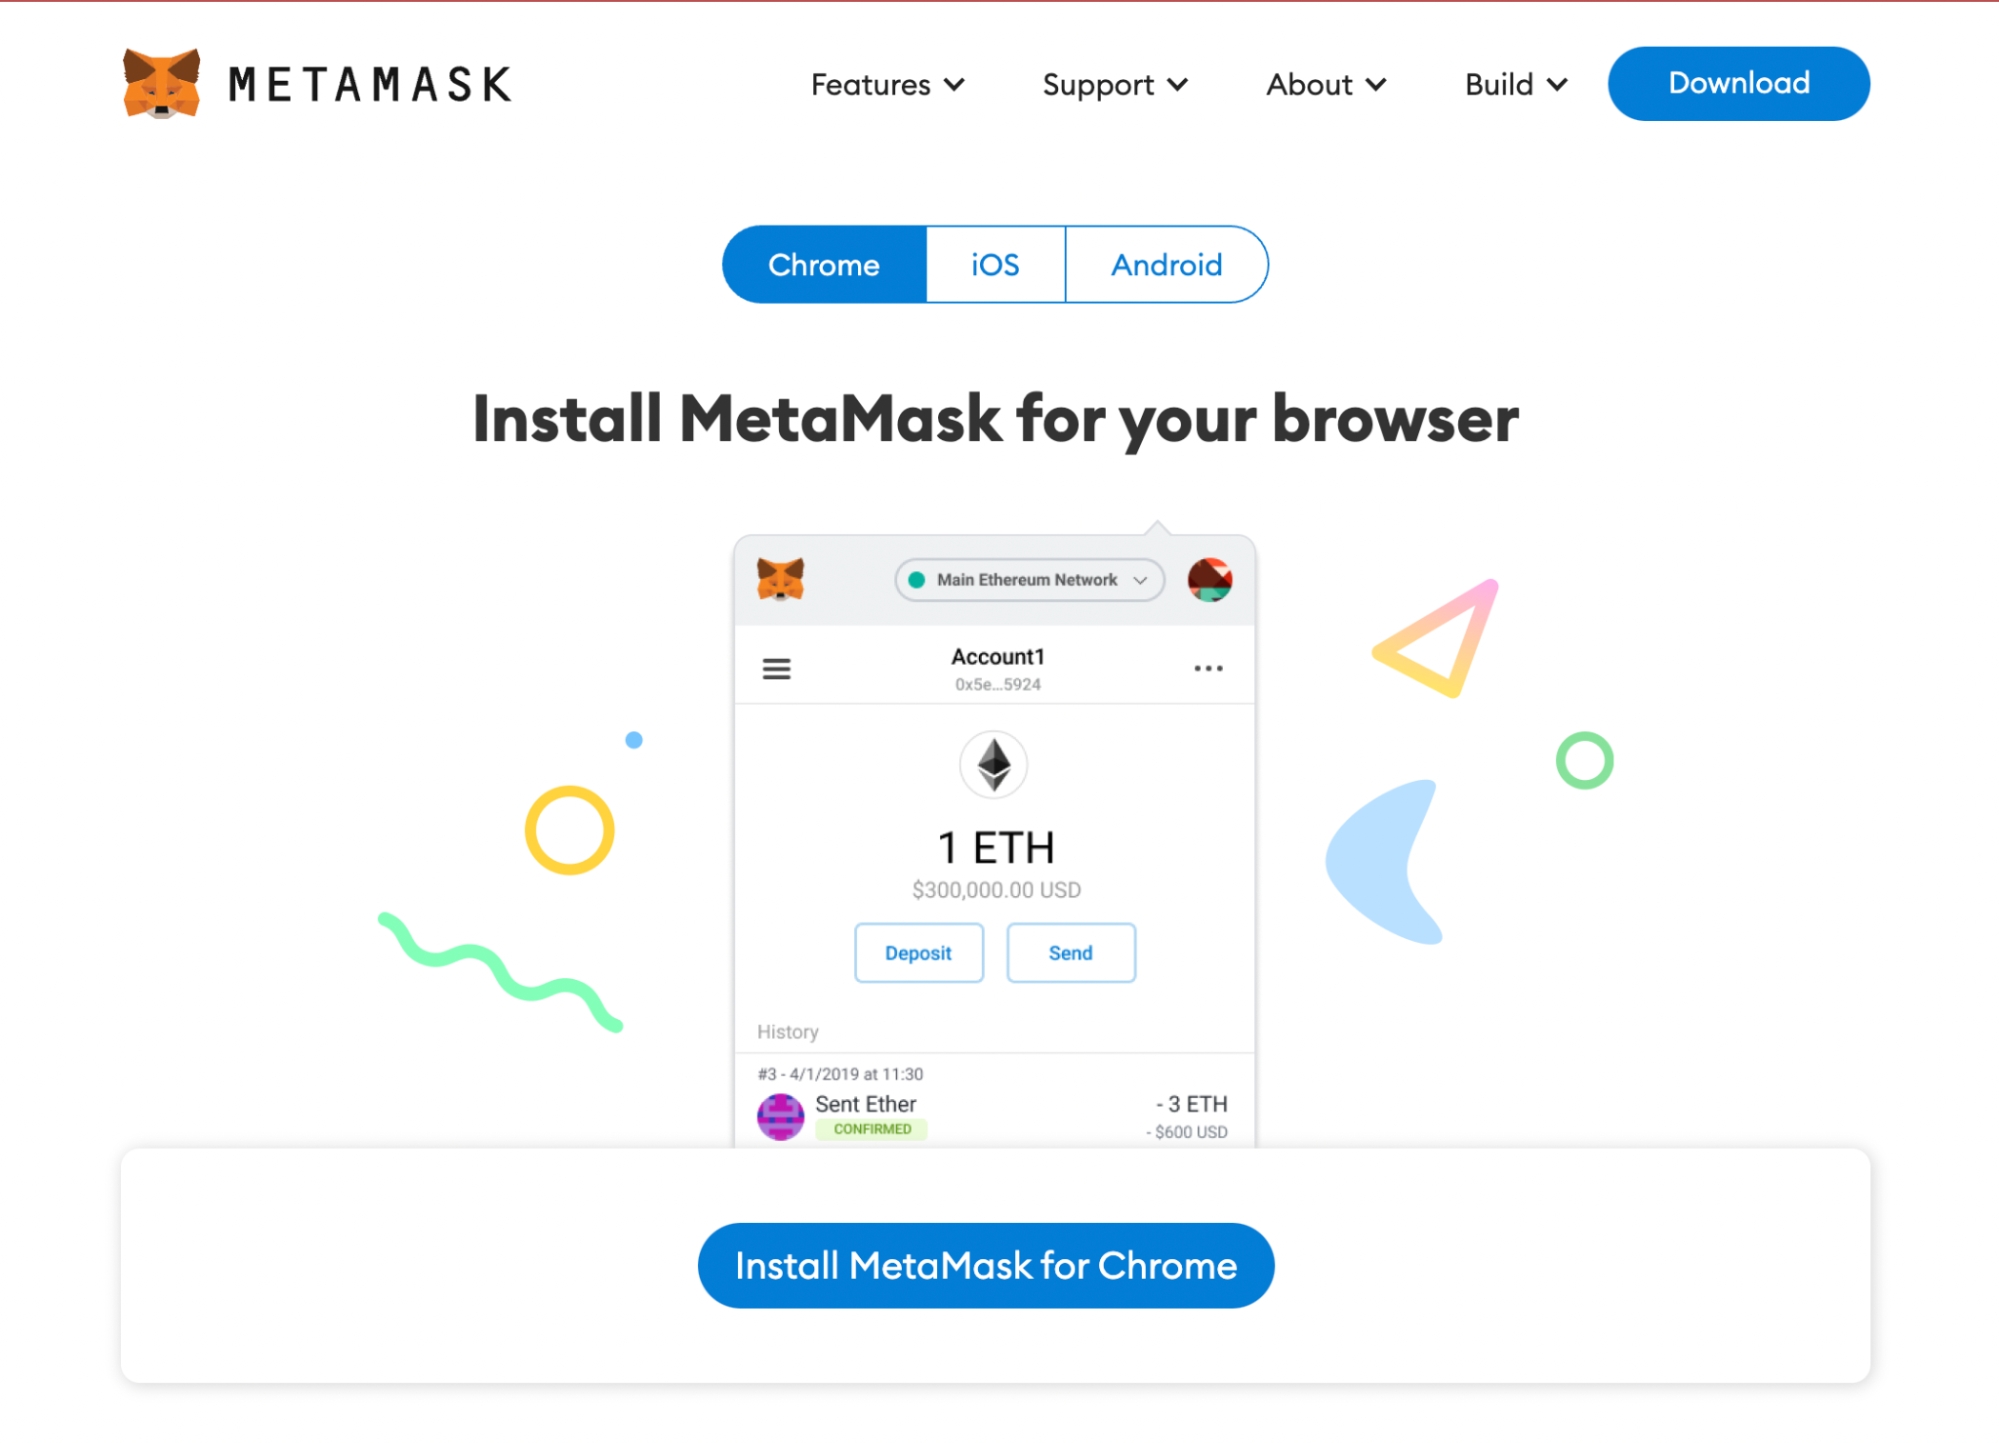
The first thing you’ll need to do is download the MetaMask wallet software onto your chosen device by visiting the official website here. You will be presented with the following options:
Browser: Compatible with Google Chrome, Firefox, Brave or Edge website browser.
Android: Compatible with any smartphone that operates using Android’s operating system.
iOS: Compatible with any iPhone.
Once you’ve selected the appropriate option, click the “Install MetaMask for …” button.
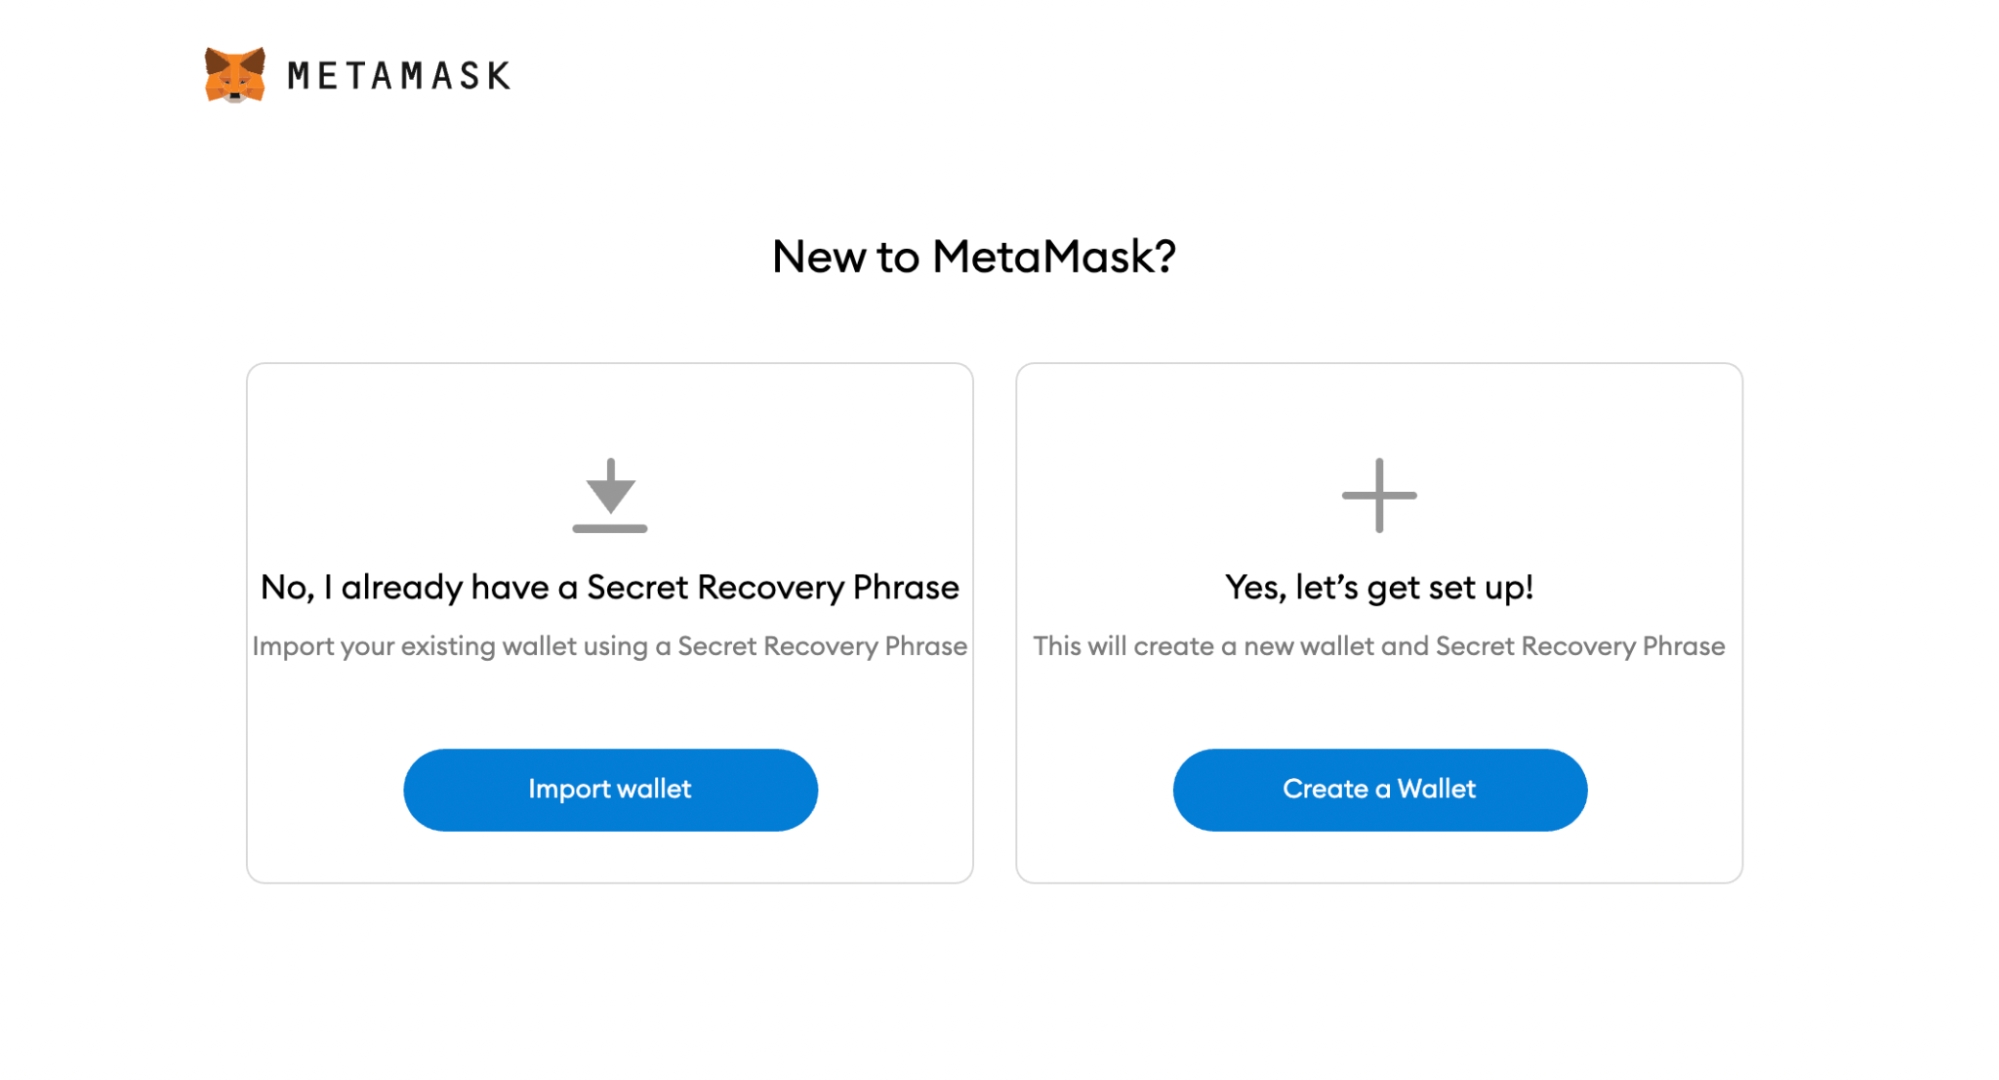
Navigate to the extension icon in the top right corner of your web browser and find the MetaMask option, once you’ve successfully downloaded the software. Click the “Get Started” button and you’ll be taken to the next page and presented with two options (see below.)
Import wallet: This is for users who already have an existing MetaMask wallet on a different device and would like to import it over to a new one.
Create a wallet: This is for users who want to set up a brand new MetaMask wallet.
Select the “Create a Wallet” option, agree to a short disclaimer that appears and create a password when prompted. As with any password, it’s vitally important you physically write several copies of the password down on different pieces of paper. You should never create a digital copy of any password you create; this includes actions like taking a screenshot of it, sending it to yourself in an email or saving it as a note on your computer. Anything digital that’s stored on your computer is accessible to hackers – don’t make life easy for them.
You will need to enter your password each time you wish to access your MetaMask wallet.
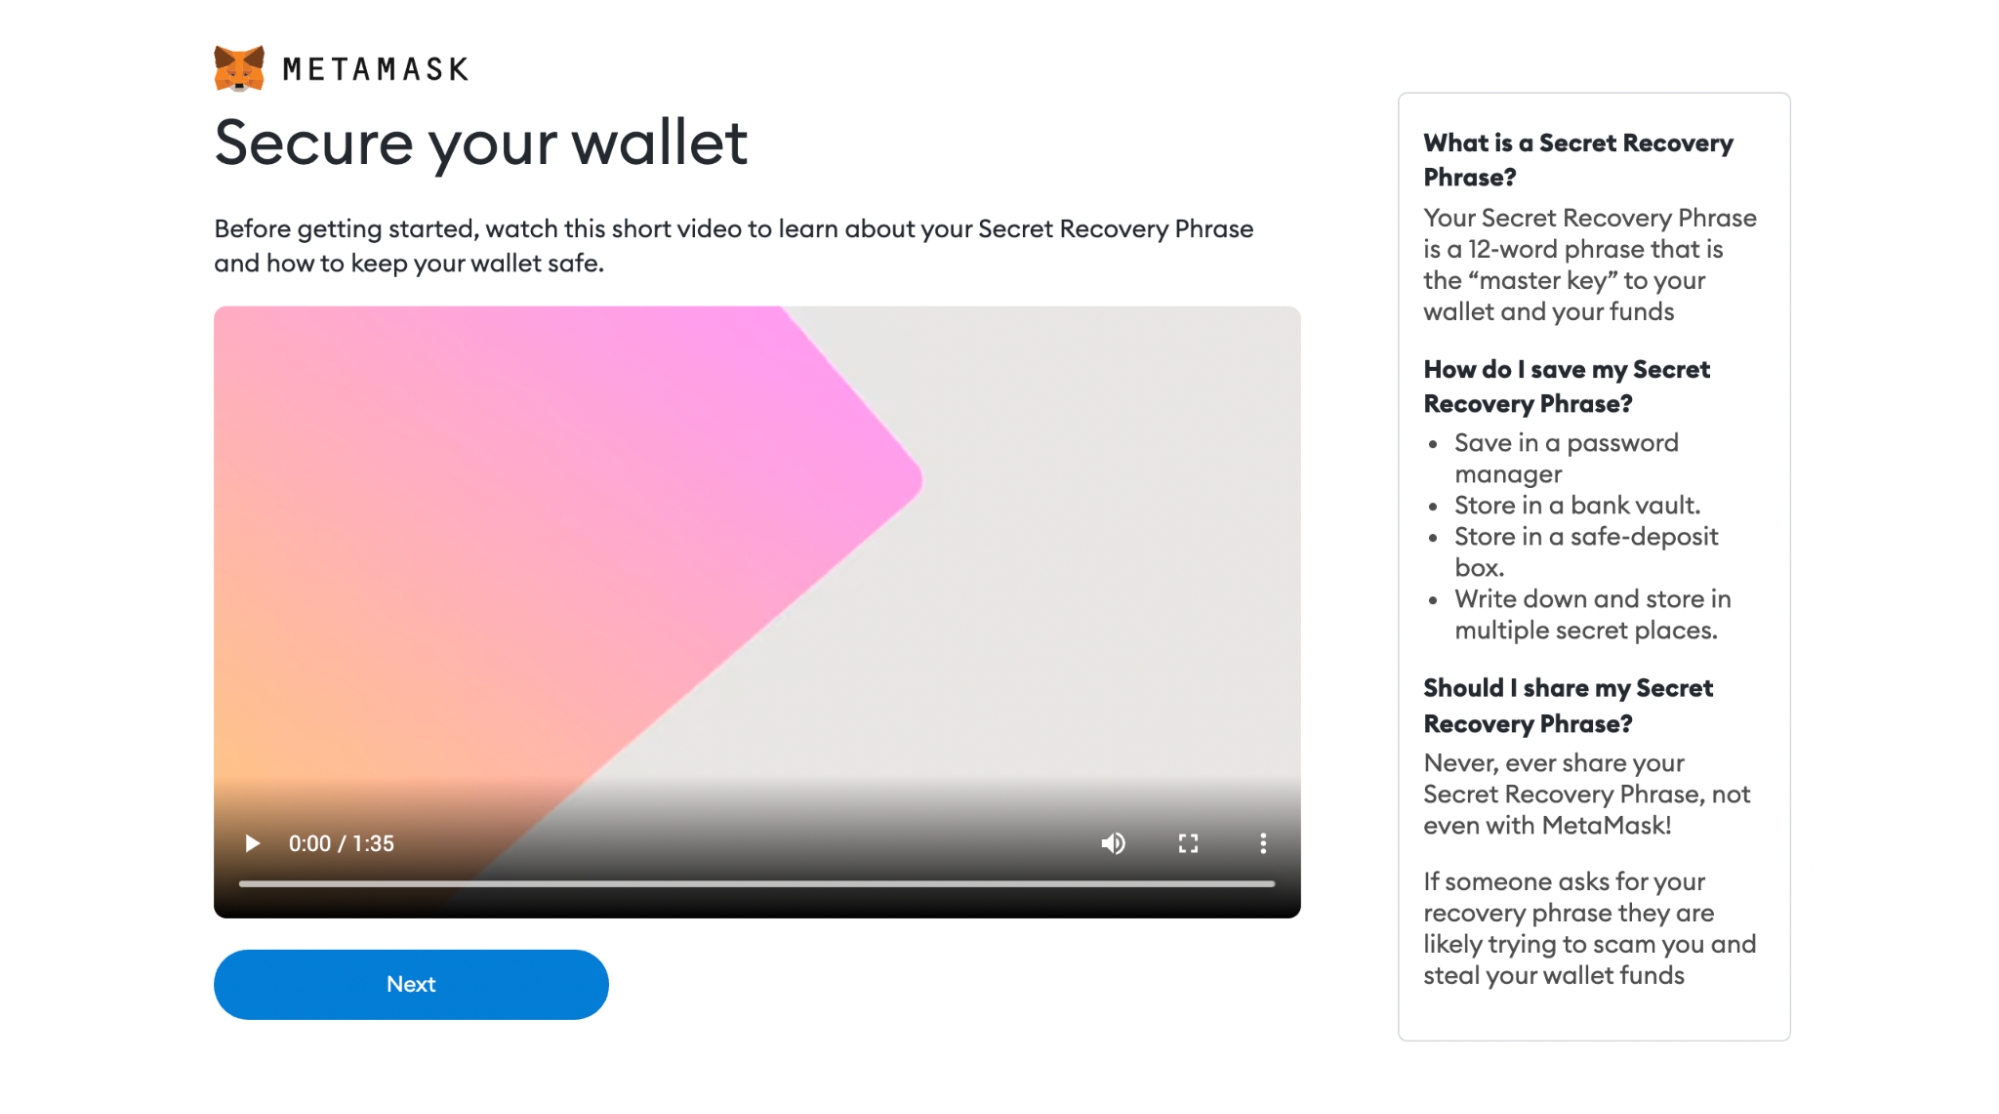
Secret recovery phrase
A screen will then appear that outlines what a secret recovery phrase is, how you should copy it down (again, on paper not in digital form) and information on why you should never share your secret recovery phrase with anyone.
In short, your secret recovery phrase comprises 12 random words. It’s there as a backup in case you lose the phone or laptop where your MetaMask wallet is downloaded and need to import it to a new device.
You will need to carefully copy down each word in the order they are presented on the screen. The order of the words is crucial as you won’t be able to import your account to a new device if the words are in the wrong order – even if you entered all the right 12 words.
MetaMask will then prompt you to type in the 12-word sequence before you can move on to the final steps.
An overview of the MetaMask wallet
Once you’ve completed the above steps, you’ll be able to access your new MetaMask wallet. There are two main components you’ll need to familiarize yourself with so that you can begin using the software:
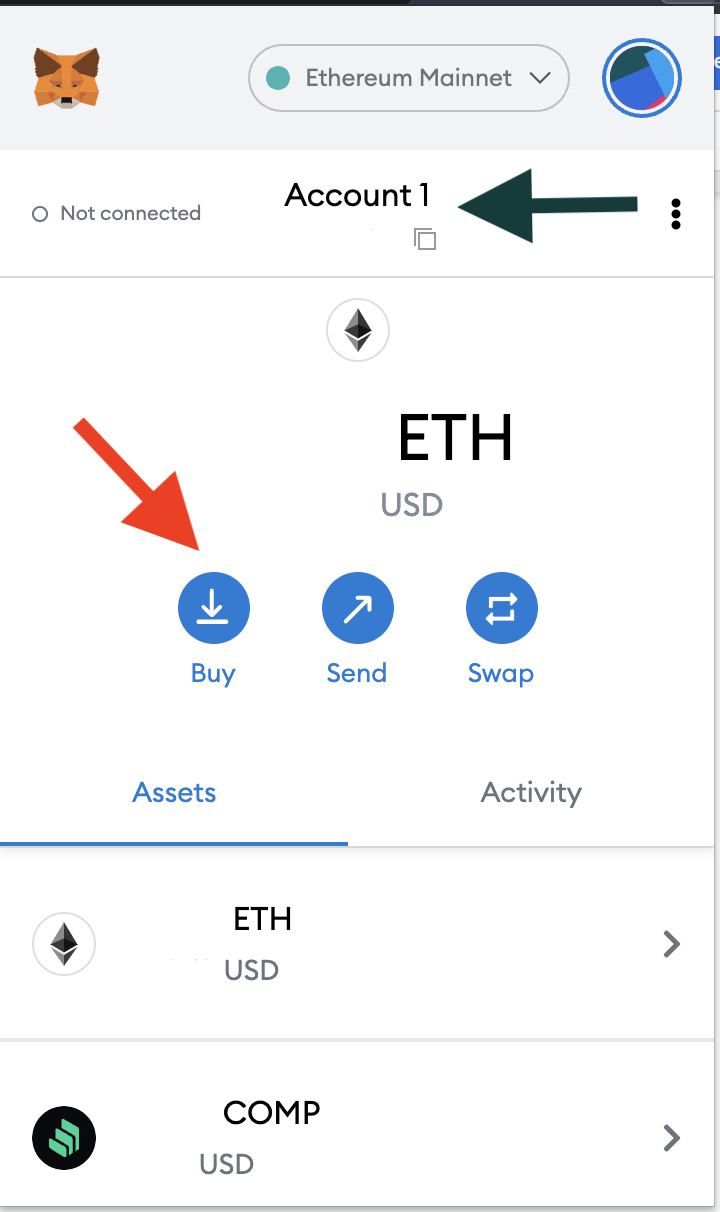
Identifying your public address: This is the address you can freely share with people or platforms like exchanges in order to receive cryptocurrency into your wallet. Think of it as your home address that you share with people to receive inbound mail. It’s always advisable, however, to check to make sure any inbound tokens are compatible with MetaMask first before receiving them, otherwise, they might be lost forever.
How to fund/buy and send: These are the core functions of MetaMask.
You can locate your unique MetaMask public address by clicking the “Account 1″ button (black arrow). To save you manually typing it when you need to use it, you can click the layered square icon beneath it to automatically copy it.
Finally, in order to begin interacting with any Ethereum platform, you’ll first need to fund your MetaMask wallet with an amount of ether – the native cryptocurrency of Ethereum. All actions on the blockchain cost a fee, whether that’s moving tokens from A to B or creating an NFT collection. This fee, known as a “gas” fee, is denominated in ether.
How much you choose to fund your wallet depends on how much you intend to interact with various platforms. For moderate use, $100 worth of ether is usually a good starting point to cover any initial fees.
Clicking the “buy” button (red arrow) will bring you to a window where you can purchase ether using Wyre or CoinSwitch. These options will allow you to purchase ether using a debit card or by exchanging it for other crypto tokens you hold.
Once you’ve purchased an amount of ether, you can now send crypto assets from your MetaMask to other wallets by inputting the recipient’s public address in the box provided and specifying the amount, including the gas fee. You can also visit the “Swap” feature – which allows you to trade ether for a wide range of other Ethereum-based tokens in-app – or begin using external services like NFT marketplaces or DeFi platforms.
With most platforms, you’ll see a “connect” button in the top right corner of the screen. After clicking it, you’ll have the option to connect your MetaMask wallet. You may need to sign a transaction in order to complete the connection process. This doesn’t cost you anything, it simply proves you have control over the wallet.
Last updated